


Most new parents confess to feeling two equally strong emotions at the birth of their baby: awesome, heart-wrenching love and total terror. It’s no wonder why: You suddenly have in your possession a tiny creature whose around-the-clock care is entirely up to you.
Because you’ve probably never done any of this before, you’re bound to make mistakes—but your baby looks so fragile that the idea of error seems disastrous. Even the most calm, cool, and collected mom can get a little flustered. In these moments of panic, remember that even though baby care may be exhausting, it is pretty simple.
Diapering

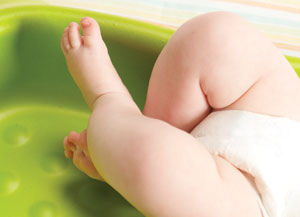
Before your baby is ever bathed, dressed, burped, or even fed, he gets a diaper put on. That diaper is the first of about 3,000 that he’ll wear in his first year, according to Laura A. Jana, M.D., a pediatrican in Denver and co-author of Heading Home With Your Newborn. So, here’s how to prepare for the poop.
Babies need to be fed and held. They need their bottoms cleaned and a safe place to sleep—but that’s pretty much all there is to it. There’s no one right way to do any of these things because no two babies, and no two families, are the same.
And even though you’ll have to wing most of it, a basic understanding of what awaits you will help. So, we consulted pediatric experts from across the country and created your primer on baby care—nothing fancy or complicated, just the basics. These are the facts you need to know to get through the first month or so of baby’s life, so take a deep breath and let basic training begin!

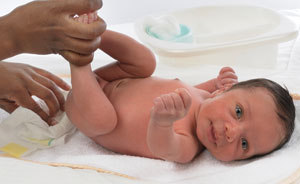
1 Get set up, then place baby in front of you.
2 Unsnap the bodysuit and slide an unfolded, clean diaper under baby (tabs come around to the front).
3 Gently hold baby’s legs with one hand and remove the soiled diaper with your other hand.
4 Wipe if necessary and place soiled wipe on top of soiled diaper.
5 Put down baby’s legs and attach clean diaper. Make sure there are no gaps in the fit; this could cause a big mess.
6Wrap dirty wipe and soiled diaper into a tight bundle and dispose.
| Dealing With Diaper Rash Avoid diaper rash by changing your baby frequently and allowing her bottom a chance to air out (or pat dry with a tissue). If the area looks red, apply Vaseline or A+D Ointment. This creates a barrier between sensitive skin and the poop and pee. If the rash worsens, use a cream with zinc, such as Desitin, which can help to heal the skin. Doctors no longer recommend baby powder, which can irritate baby’s lungs, but if you do want to pat some on, be sure it is talc-free. |
 |

Dealing With Diaper Rash
Avoid diaper rash by changing your baby frequently and allowing her bottom a chance to air out (or pat dry with a tissue). If the area looks red, apply Vaseline or A+D Ointment. This creates a barrier between sensitive skin and the poop and pee. If the rash worsens, use a cream with zinc, such as Desitin, which can help to heal the skin. Doctors no longer recommend baby powder, which can irritate baby’s lungs, but if you do want to pat some on, be sure it is talc-free.
Have Everything You Need Within Reach
This means a few diapers, wipes, diaper ointment and cream, and a change of clothes for baby, in case you discover leakage. Never leave your baby alone on an elevated surface, because even before he starts rolling, he can scoot and squirm around. The #1 changing rule: Keep one hand on the baby at all times.
You Don’t Need Wipes For Pee Diapers
You don’t have to worry about wiping baby down after a pee, Jana says, because urine rarely irritates the skin, and because today’s diapers are so absorbent, the skin hardly comes into contact with urine anyway.


Yep, when you take off that diaper and expose your baby boy to the open air, you may get a surprise attack of pee—all over you and everything else. To prevent this, place a cloth or paper towel over his penis while you’re doing the change.
Cleaning Girls
When you’re changing your girl’s stinky diaper (wiping front to back, of course), be sure to clean off any poop in the folds of the labia. But don’t worry about removing the totally normal white discharge that is often found there, Jana says.
The First #2
Baby’s first bowel movement, called meconium, will resemble black tar. Don’t be alarmed—this is normal.
Cord Care
You’ll be relieved to know that you don’t actually have to do anything to care for your baby’s umbilical cord stump, which should fall off between two and three weeks after birth. You can use an alcohol swab daily around the cord stump to help dry it out more quickly, but Swanson says that’s not necessary as long as you keep the area dry by giving sponge baths and rolling the top of the diaper down.
When the cord does detach, it can sometimes get a little stinky, Swanson says, and you may notice a yellowish discharge or a little blood streaking—all of this is a normal part of the healthy tissue dying off and scabbing. But if the area continues to smell and discharge, won’t stop bleeding, or the skin of the belly around the cord looks red or infected, you’ll need to call your doctor.
Breastfeeding


It Gets Easier
Breastfeeding ends up being easy, convenient, and deeply satisfying but it doesn’t usually start off that way, Jana says, so you shouldn’t feel as if you’re failing just because neither you nor your baby takes to it instantly. For most new moms, nursing involves hard work and discomfort at first, but within a few weeks, you’ll start to see how much it pays off.
Nurse Early and Often
Babies are unusually alert immediately following birth, so take advantage by nursing within the first hour of birth. In the first week, try nursing whenever baby is awake, but at least every two hours—this helps trigger your milk to come in between day two and five.
After a couple weeks, you will start to notice more of a routine where you’re feeding every 2 to 3 hours, with one longer stretch of 4 or more hours (hopefully at night), which boils down to 8 to 12 feedings in a 24-hour period. Your milk production works according to supply and demand, so it is the act of your baby sucking at the breast (demand) that activates milk production (supply).


Getting a good latch isn’t rocket science—you just need to know how, and a lactation consultant or a seasoned nurse can be tremendously helpful in teaching you exactly how to position the baby for the best results. Here are a few basic steps.
1 Compress your breast between your thumb and forefinger to create a shape that mimics the shape of baby’s mouth.
2 Stimulate your baby to “root,” by tickling her mouth with the nipple (bringing her head to your breast, not the breast to head). This should cause her to open wide.
3 Once her mouth opens really wide, bring her head closer to your breast, and put it fairly deep into baby’s mouth.
4 When her mouth closes and she begins to suck, baby’s gums should be around the areola, not gripping onto the nipple.
5 If baby does grip the nipple, immediately use your finger to gently ease open her gums and try again for a proper latch. Getting it right from the beginning will prevent you from having sore, cracked, and—yikes!—bleeding nipples.
Circumcision Care
As if there isn’t enough to tend to in the diaper area, if your baby is circumcised, you’ll have to care for that as well. Luckily, the skin heals very quickly, usually within a week or so, and caring for it is simple. Your main responsibility will be to keep the area clean and dry and to insure that it doesn’t get rubbed up against, which is why you’ll apply gobs—yes, gobs—of Vaseline until he’s healed.
In the hospital, your baby will have a layer of gauze over the Vaseline, but that’s optional once you’re home, Lonzer says. She also warns parents that it is totally normal for the area to be red initially and that once the redness subsides, you should prepare to see some yellow crustiness, between the third and fifth day after. And if you notice any bleeding, swelling, fluid-filled sores, or fever, give your pediatrician a call.
Bottle Feeding


If your baby drinks from a bottle, you’ll be able to keep track of how much she’s eating. But be warned: How many ounces a baby will drink varies, so don’t be alarmed if your baby is satisfied with half of what a friend’s baby typically eats. In the first few feedings, babies will take .5 to 1.5 ounces of breast milk or formula and after the first few days, babies will drink between 12 to 24 ounces during the course of a day.
Wait to Buy Bottles
There are a million kinds of bottles and nipples on the market, but what works best depends on you and your baby. Most parents look for a bottle designed to prevent gassiness, such as angled bottles or ones with disposable liners. These can be convenient, but you can keep baby from swallowing air by just keeping an ordinary bottle at an angle so that the whole nipple is filled with milk. Jana does recommend choosing a bottle that is free of bisphenol-A (BPA).
No Nuking Baby’s Bottle
The microwave is great for heating grown-up meals but it should not be used to warm up a baby’s bottle. It creates hot spots, and it will also destroy valuable antibodies in breast milk. Use a bottle warmer or just drop the bottle in a pot of hot water for a few minutes.
Toss Leftovers
Be conservative when you fill baby’s bottle, because after she’s done eating, you’ll have to throw away whatever’s left in the bottle within an hour of starting the feeding. This is because bacteria from your baby’s mouth can multiply in the milk or formula and make your baby ill if she sucks from it again, Jana says. Even if your baby hasn’t taken a sip from a bottle you’ve prepared, if you’ve left it out of the fridge for more than two hours, it needs to be tossed.
Nipple Confusion
This term can be somewhat misleading. According to Jana, sometimes babies who haven’t fully gotten the hang of nursing yet will show a preference for a bottle, because bottle-feeding is easier for babies to master at first (think of sucking from a straw vs. lapping milk). So her advice is: Don’t introduce a bottle to a baby that you want to breastfeed until the nursing goes smoothly for a week or so.
Formula Feeding
If you’re feeding your baby with formula, you can expect at least five pee diapers from the first day of life, Jana says, and you likely won’t see that seedy mustard poop, but something more pasty that comes in a range of colors. When it comes to preparing the formula, there are a few tricks of the trade.
Finding a Formula
There are dozens of brands of formula and more specialized categories available including soy, hydrolysate, organic, prebiotics, and formulas made for preemies. Unless your baby is premature or there’s a history of formula intolerance in the family, start with a standard cow’s milk formula and take it from there, says Deb Lonzer, M.D., chair of the department of regional pediatrics at Cleveland Clinic Children’s Hospital in Ohio.
Just be sure the formula you choose is iron-fortified and look for something that contains DHA and AHA—fatty acids that some studies show lead to better vision and higher IQ in babies. If you’re baby isn’t doing well on one kind of formula you can always switch, but Lonzer encourages parents to discuss it with a pediatrician first.
Mix With Care
Pay attention to recommended ratios whenever you make a bottle. Formula that’s too diluted or too concentrated can cause severe medical problems for your baby.
Careful With Tap Water
Tap water should be just fine to use in a formula bottle, and there’s no need to boil it first. But you do need to make sure that your water does not contain added fluoride, because before 6 months of age, fluoride can actually harm your baby’s developing teeth. If your tap water contains fluoride, buy distilled purified or de-mineralized water. When baby is older than 6 months, use tap water that contains 0.3 parts per million (ppm) of fluoride.
Cradle Cap


You’ll know your baby has cradle cap if her scalp has flaky, dry skin or patches of thick, oily, yellowish or brown scaling. While this sounds gnarly, it is totally harmless, not at all contagious, and probably doesn’t bother your baby in the slightest. It’s more of a cosmetic issue than a medical one, Swanson says, and if you leave it alone, it will likely clear up on its own.
Babies tend to get the most cradle cap between weeks 4 and 8, and you may see the flakes not just on the scalp but on eyebrows, behind the ears, and the base of the nose. In these instances, Swanson recommends removing the flakes so it doesn’t spread, and to do this, cover your baby’s scalp with olive oil or baby oil, let it soak in for about 15 minutes, then remove the scales gently with fingers or a baby brush, then wash baby’s head with mild shampoo. Don’t fret if some hair comes off along with the flakes. Chances are, once you remove the cradle cap, it’ll be gone for good.
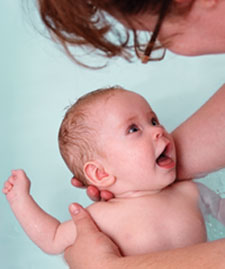
Burping


Burping is something that happens naturally, so all you need to do is help things along by patting your baby’s back—sort of like tapping a can of soda to get the bubbles on the side of the can rise to the top, says Wendy Sue Swanson, M.D., a pediatrician at Seattle Children’s Hospital. Swanson also emphasizes that while some babies are loud, smacking feeders who swallow a lot of air, others just don’t need to burp very much, so there really is no science to the burping process.
Timing
It’s a good idea to try burping when you switch breasts, or in the middle of a bottle, and then again at the end of the feeding. Most babies burp within the first couple minutes of back patting. If your baby hasn’t burped after 4 to 5 minutes, she probably won’t, so just give it a break and try later. Patting should be less forceful than a clap but more then a caress, and don’t be surprised if the burp is accompanied by some spit-up, Swanson says.
Three Burping Positions
(1) In the traditional burping position, hold your baby facing you, against your chest, with his chin above your shoulder.
(2) Many parents feel more comfortable sitting their baby upright on their lap with one hand under his chin, and the other hand free to pat.
(3) You can also try laying your baby on his belly across your lap, which may help things along by compressing the stomach slightly.
Soothing
In the first few weeks, it’s a very good bet that your baby will respond well to some combination of the following soothing techniques, which are all more or less based on recreating the gentle, comfortable in-utero experience, Lonzer says.
Warmth
Babies adore skin-to-skin contact for many reasons, but an important one is that your body has a lovely warming effect and scent. Swaddling your baby, which keeps him in a tight, warm bundle, can also be very calming for him.
White Noise
In the womb, the steady sound of your heartbeat and the muffled noise of the blood rushing through your body provided a perfect blend of white noise to lull your baby. Once he’s born, you can simulate this by running the vacuum cleaner, washing machine, blow dryer, or by singing or making a gentle “shhh shhhh” sound softly to your baby.
Movement
For nine months, your baby was gently bounced as you walked around, so it’s not surprising that small, repetitive movements are an important piece in the soothing puzzle—whether it’s bouncing, carrying, or taking your baby for a ride in the stroller. When you don’t have the stamina to do the heavy lifting yourself, try a bouncy seat.
Bedtime


While there are many opinions about how to put your baby to sleep, most experts agree that in the first month of life, new parents need to focus on making it through the day (and night) with their sanity intact.
As long as you provide a safe sleeping environment for your newborn—on her back, away from blankets, stuffed animals, and other suffocation hazards—there’s really nothing you can do when putting her to sleep that will damage the choices you make about bedtime later on, Swanson says. But when your baby’s about a month old, it is a good idea to start putting her down when she looks drowsy but before she’s entirely asleep so she can learn to self soothe.
In the first few weeks, you can help your newborn get her nights and days straightened out, Swanson says. As your baby starts to replace tiny catnaps with longer periods of 4 to 5 hours, you may find that these stretches are occurring during the day and, just as you’re winding down at night, she’s winding up. To turn this reversal around, you need to provide cues that teach your baby to sleep at night and stay up during the day.
For naps, put her to sleep in a sunny, active room of the house to keep the naps to less than three hours at a time. At night, keep the lights off, stay quiet, and tend to your baby’s needs in a way that is boring and brief. Eventually, she’ll kick the nocturnal habit.
Taking Temperature
In the first two months, you’ll need to pay close attention to your baby’s temperature, Swanson says, and call your pediatrician right away if the temperature rises above 100 degrees F. Because an accurate reading is so important in the first few months, most pediatricians recommend using a rectal thermometer, which is very reliable. You’ll probably want someone to hold baby’s legs so you can focus on advancing the thermometer in just a little, placing only the tip in the rectum. The prospect of this is sure to freak you out big time, but there are many digital rectal thermometers for newborns, like Safety 1st Gentle-Read Rectal Thermometer, which takes 5 seconds and has guards so that you can’t over-insert it, so it’s a perfectly painless process for you both.
Bathing
Giving baby her first bath can be an intimidating prospect: How convenient, then, that you’ll only be giving sponge baths for the first week or so of life, while you’re waiting for the cord and the circumcision to heal.
Sponge Baths
Place a basin of warm water, a few washcloths, a diaper, and a change of clothes next to the towel that you’ll lay your baby on. You don’t need to use soap, but if you’d like to, remember that less is more for sensitive baby skin, so use just a dime-sized amount. Just wipe your baby down with a damp washcloth, and if you’re using soap, be sure to wipe gently with another clean, damp cloth. You can use a cotton ball dampened with warm water to wipe each eye, from the inside out.
Tub Baths
Once the cord falls off and your baby’s circumcision heals, give tub baths two or three times a week. Your primary job is to keep baby’s head well above the water, which shouldn’t be hard if you use 3 to 4 inches of water and get an infant tub. You will want to pay special attention to your baby’s skin folds, starting in the armpits and groin, then the folds in the neck and the thigh, and the diaper area last. And remember, never leave your baby unattended in the
water, even for a second.
BEFORE BATH:
Turn up the heat and close all windows and doors so drafts don’t chill baby.
AFTER BATH:
Use your finger in a damp baby facecloth to gently massage and clean baby’s gums and tongue—once each day.
And there you have it. Everything you need to know about the care of your baby, top to bottom—with particular emphasis on the bottom. It may seem like a lot to take in, but remember that you’ll be doing all of these things over and over again, until you could do them one-handed, blind-folded, and in under 30 seconds while making dinner and opening your mail. You will find that the learning curve in parenting is the steepest you’ve ever encountered, taking you from novice to pro in a matter of days. Make no mistake, you’ll be a leading authority on the totally unique little person that is your baby—that expertise requires
absolutely no training.